|
Make sure your computer is suited for minimal system requirements, the latest version of Exsate VideoExpress is installed, your camcorder is connected to the computer and switched to the VCR mode1. Be ready to do some mouse clicks and do the following:
1. Creating a project
-
Run Exsate VideoExpress, make sure the "Enter a new project name"
option is selected and change the default project name to any what you want.
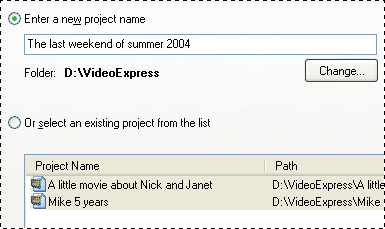
Click the Next button.
Make sure the "Capture video", "Edit captured video" and "Export/recompress video" options are selected.
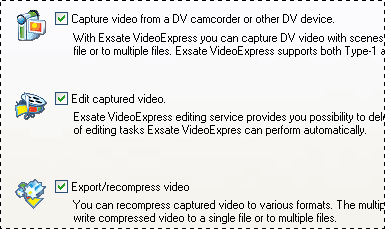
Click the Next button.
2. DV Capture setup
Make sure the "Capture from 00h00m00s00f to the current tape
position"
option is selected if your tape is not in the beginning of the record position, otherwise
select the "Capture from the current tape position to the end of the
record" 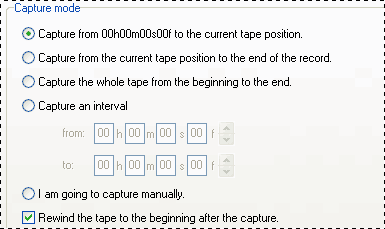
Click the Next button.
3. DV Editing setup
Make sure you have the right option in the "Project video format" combobox (NTSC or PAL) selected.
-
Set 2 frames to cut from the beginning of a scene if your camcorder corrupts frames, otherwise set frames count to zero.
Set other settings as shown on the picture below.

-
Set the "Auto editing" settings as shown on the picture below.
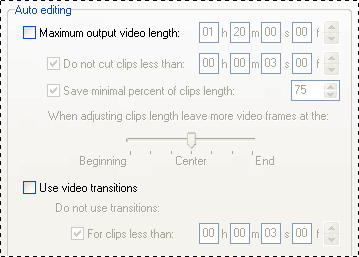
-
Make sure both checkboxes in the "Manual editing" group are unchecked.
-
Click the Next button.
4. DV Export setup
-
Select the "AVI" radio button in the "Format" group box.

-
Select a preset or select custom settings.

-
Select the DivX® video encoder end set passes count equal to 2.

-
Make sure the "1 pass" option in the right combobox is selected and press the "Configure" button

-
Select the "Multipass, 1st pass" bitrate mode on the encoder properties dialog and click the "OK" button.2

-
Select the "2 pass" option in the right combobox and press the "Configure" button

-
Select the "Multipass, nth pass" bitrate mode on the encoder properties dialog and click the "OK" button.2

-
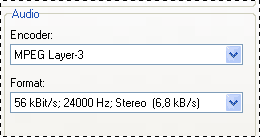
Select an audio encoder and format.
-
Make sure the "Split to multiple files" option is selected.

-
Click the Next button.
5. Run
-
Check the "Shutdown the PC after finished" option if you wish to Exsate VideoExpress will shutdown the PC.

-
Click the Next button to start.
That is all. You are free of any work now. Exsate VideoExpress will automatically capture DV video,
fix some defects of recorded video and recompress it to DivX AVI files with high quality.
After that Exsate VideoExpress will shutdown the PC.
Enjoy now with Exsate VideoExpress!
| 1 |
Read in the camcorder manual how to connect your camcorder to a computer. |
| 2 |
More information about DivX® video encoder settings you can get in the encoder help files or on the official website. |
|
Highlight
In this article we show you how to capture video from a DV camcorder, fix some defects of recorded video and recompress the DV video to multiple DivX AVI files with high quality 2 pass encoding.
Tips
To make a video archive creation easier for you, please follow some instructions while video recording:
- Record your video from the beginning of a tape.
- Do not rewind a tape to the beginning after a recording.
- Press the Stop button as soon as possible if you are recording a wrong scene.
Rewind a tape to the end of the previous scene if the wrong recorded scene is longer than 3 seconds.
You should not find exactly the end of the previous scene, you have to be sure a wrong scene is less than 3 seconds only.
The tips listed above are not required. They only help you to make a movie creation easier.
|


